Spring Boot开发的目的是为了简化Spring应用的开发,使用Spring Boot可以零配置开启一个Spring应用。这得益于Spring Boot中的自动配置组件,如果开发者觉得默认的配置文件不满足要求,
可以自己配置一个properties文件或者yml文件,配置文件中填写需要覆盖的配置,来达到定制化的效果
搭建项目
这里使用IDEA工具来生成一个Spring Boot的项目.
IDEA创建新项目,选择图片中红框中的内容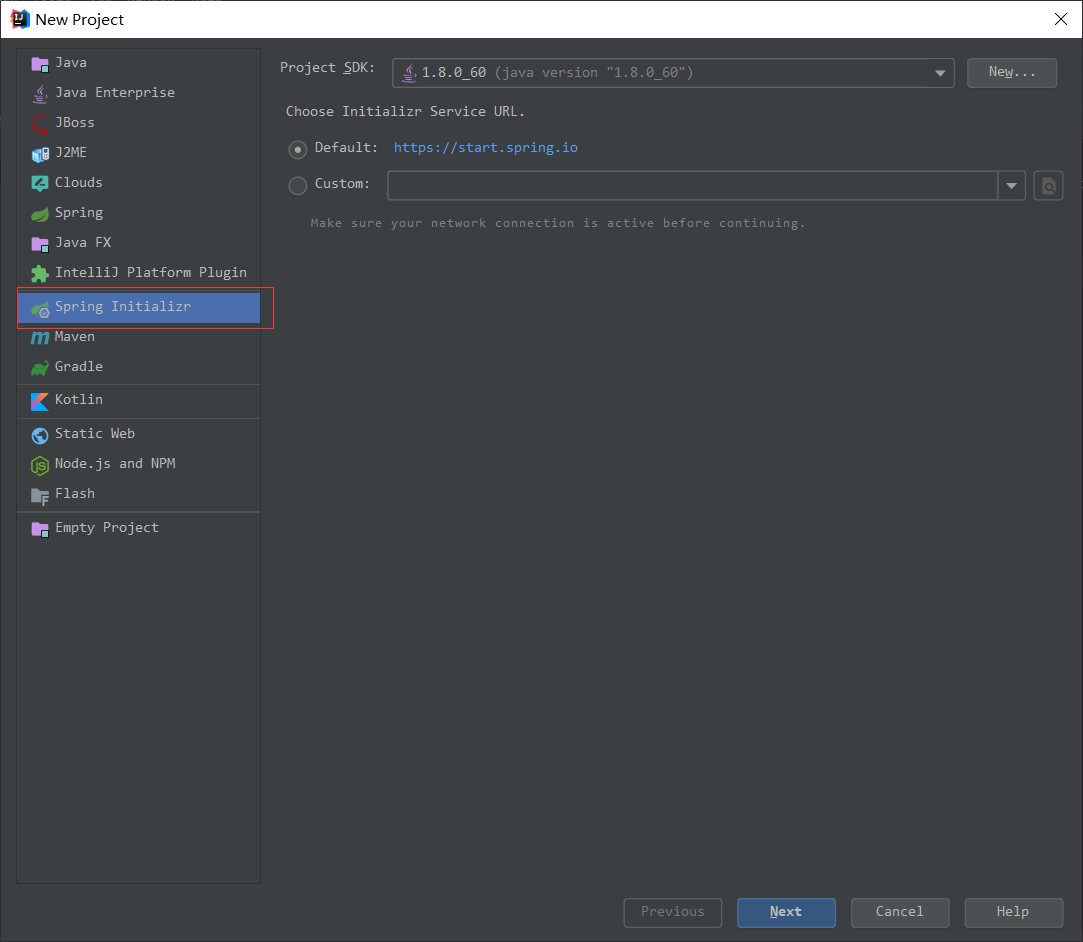
点击下一步,填写包名和项目名称等相关信息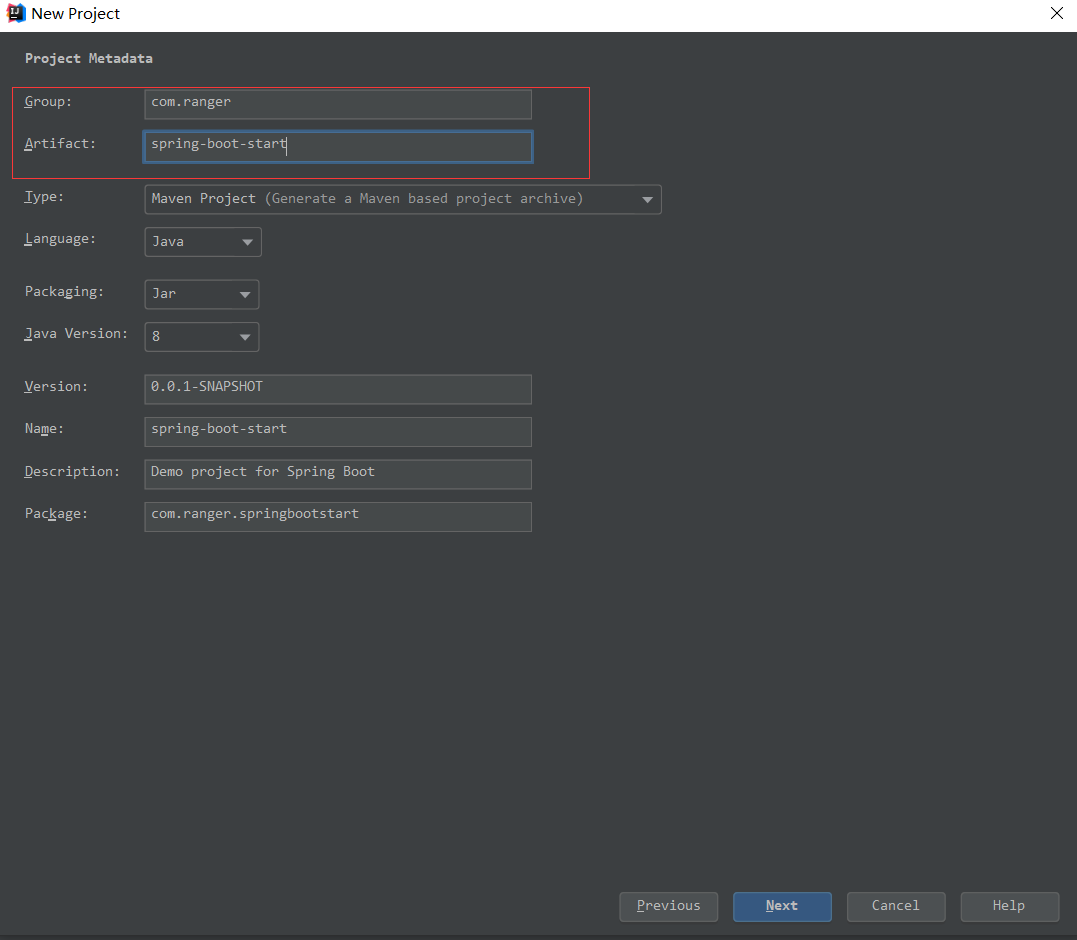
下一步后选择需要添加的依赖,这里我们暂时还不需要添加依赖,就不勾选任何依赖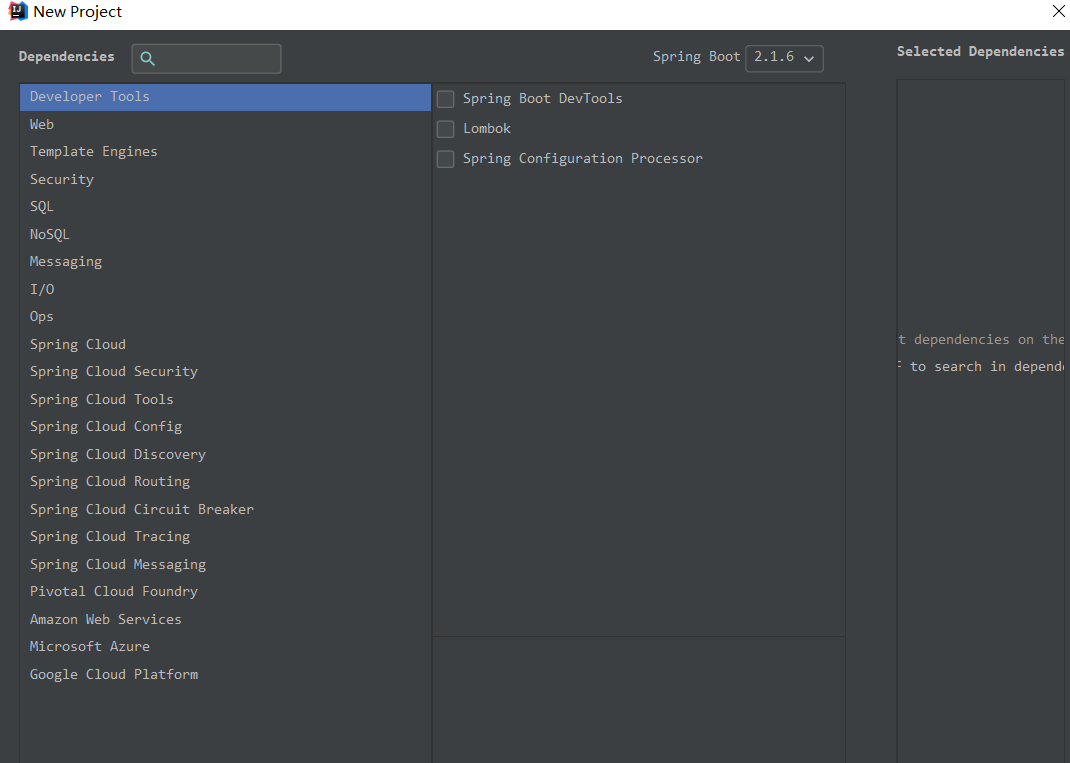
然后选择项目文件的路径,选择finish就可以创建一个简单的Spring Boot应用程序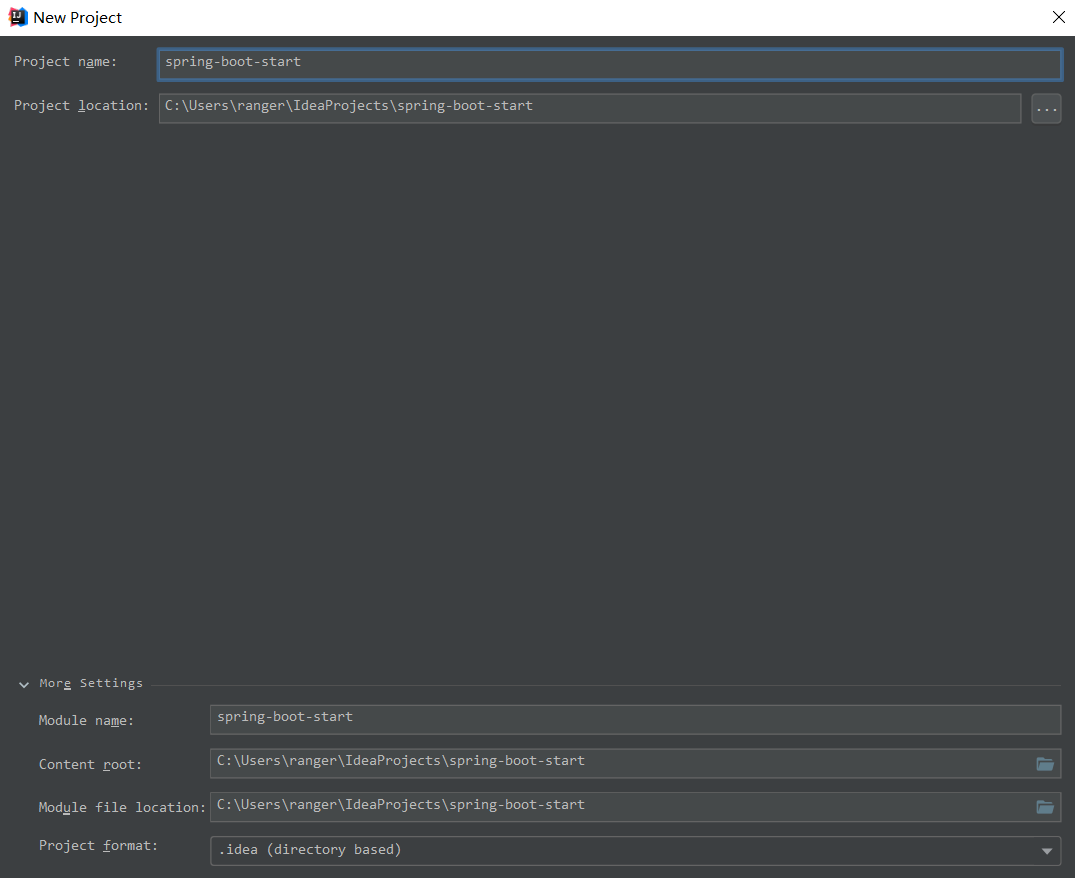
运行演示
运行启动类的main方法,就可以启动刚刚创建的Spring Boot应用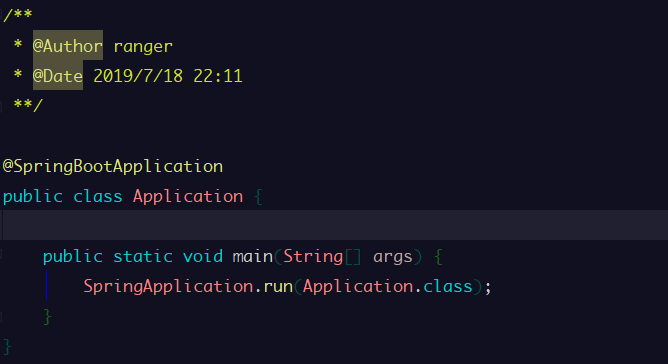
启动过后,应用会在控制台打印出启动的日志信息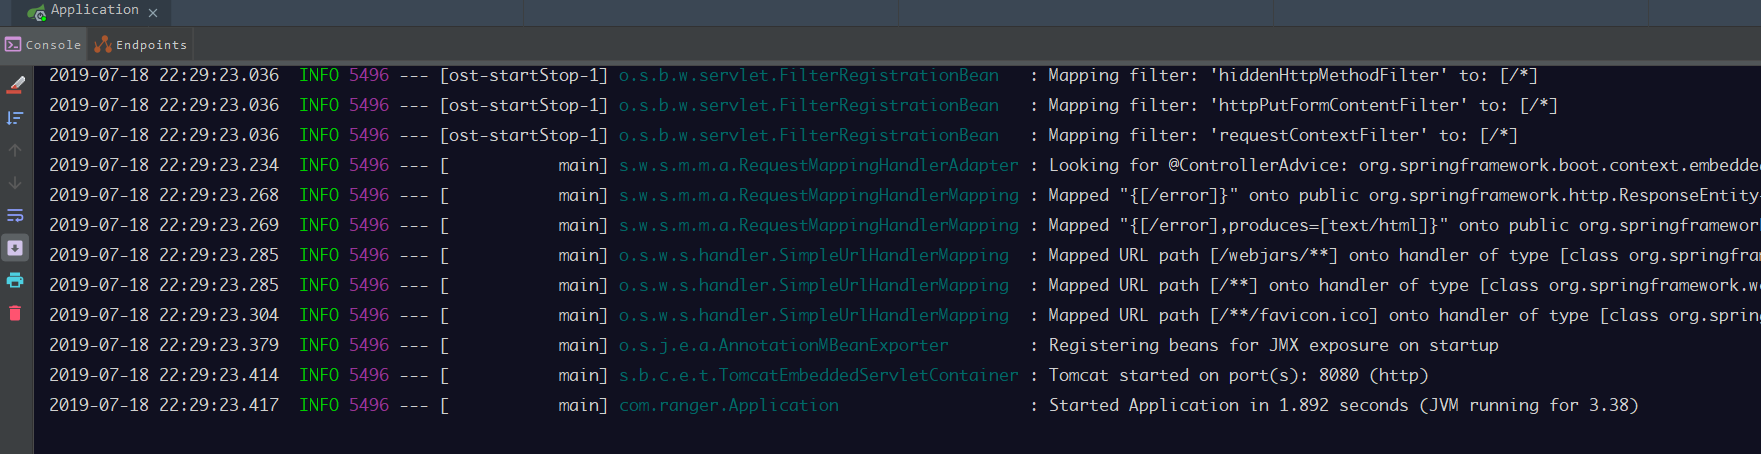
如果没有异常信息,那么这个最简单的Spring Boot应用就成功搭建并运行了
打包部署
Spring Boot创建的应用可以有两个运行方式,一种是将整个项目打包成Jar包直接运行,这是因为Spring Boot中集成了tomcat容器。
另外一张方式就是把项目打包成war包,然后放入tomcat服务器中,运行tomcat来访问应用
简单起见,在这里我们先使用第一中介绍的使用Jar包运行的方式,另外一种方式我们会在后面介绍怎么做
先修改项目的pom文件中的maven打包方式为jar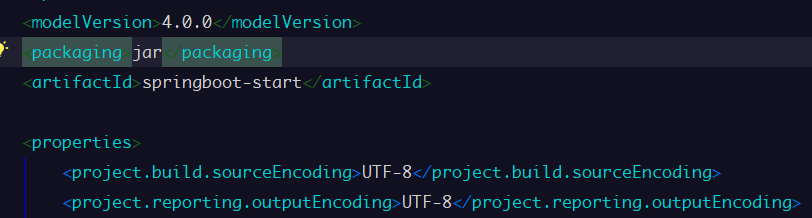
然后可以看到生成的jar文件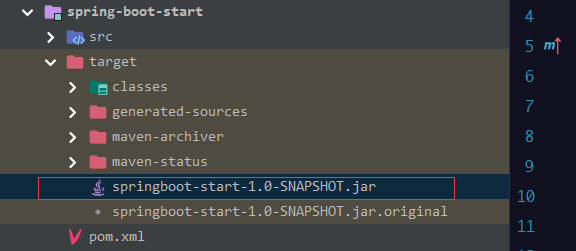
我们可以直接在命令行中使用java -jar `来运行打包的jar文件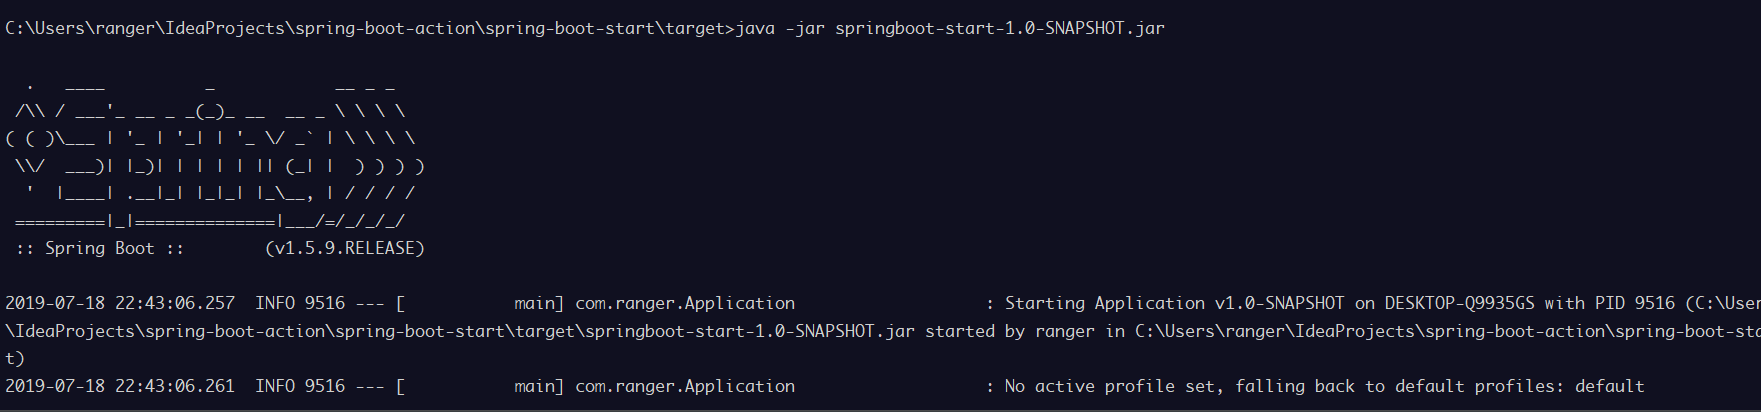
可以看到应用打印出的启动日志
简单分析
神奇的发现我们什么都没有配置就能够开启一个Spring的应用,这是怎么做到的呢?先从pom.xml分析导入了什么依赖1
2
3
4
5
6
7
8
9
10
11
12
13
14
15
16
17
18
19
20
21
22
23
24
25
26
27
28
29
30
31
32
33
34
35
36
37
38
39
40
41
42
43
<project xmlns="http://maven.apache.org/POM/4.0.0"
xmlns:xsi="http://www.w3.org/2001/XMLSchema-instance"
xsi:schemaLocation="http://maven.apache.org/POM/4.0.0 http://maven.apache.org/xsd/maven-4.0.0.xsd">
<parent>
<groupId>org.springframework.boot</groupId>
<artifactId>spring-boot-starter-parent</artifactId>
<version>1.5.9.RELEASE</version>
<relativePath/> <!-- lookup parent from repository -->
</parent>
<modelVersion>4.0.0</modelVersion>
<packaging>jar</packaging>
<artifactId>springboot-start</artifactId>
<properties>
<project.build.sourceEncoding>UTF-8</project.build.sourceEncoding>
<project.reporting.outputEncoding>UTF-8</project.reporting.outputEncoding>
<java.version>1.7</java.version>
</properties>
<dependencies>
<dependency>
<groupId>org.springframework.boot</groupId>
<artifactId>spring-boot-starter-web</artifactId>
</dependency>
<dependency>
<groupId>org.springframework.boot</groupId>
<artifactId>spring-boot-starter-test</artifactId>
<scope>test</scope>
</dependency>
</dependencies>
<build>
<plugins>
<plugin>
<groupId>org.springframework.boot</groupId>
<artifactId>spring-boot-maven-plugin</artifactId>
</plugin>
</plugins>
</build>
</project>
从pom文件中我们可以看到项目导入了几个依赖,分别是web,test依赖,一个用于web开发支持,一个用于测试支持
spring-boot-starter-parent指定了当前项目为一个Spring Boot项目,它提供了诸多的默认Maven依赖,具体可查看目录repository\org\springframework\boot\spring-boot-dependencies\1.5.9.RELEASE下的spring-boot-dependencies-1.5.9.RELEASE.pom文件,这里仅截取一小部分:
这里定义了很多依赖的版本1
2
3
4
5
6
7
8
9
10
11
12
13
14
15
16
17
18
19
20
21
22
23
24
25
26
27
28
29
30
31
32
33
34
35
36
37
38
39
40
41
42
43
44
45
46
47
48
49<properties>
<spring-security.version>4.2.3.RELEASE</spring-security.version>
<spring-security-jwt.version>1.0.8.RELEASE</spring-security-jwt.version>
<spring-security-oauth.version>2.0.14.RELEASE</spring-security-oauth.version>
<spring-session.version>1.3.1.RELEASE</spring-session.version>
<spring-social.version>1.1.4.RELEASE</spring-social.version>
<spring-social-facebook.version>2.0.3.RELEASE</spring-social-facebook.version>
<spring-social-linkedin.version>1.0.2.RELEASE</spring-social-linkedin.version>
<spring-social-twitter.version>1.1.2.RELEASE</spring-social-twitter.version>
<spring-ws.version>2.4.2.RELEASE</spring-ws.version>
<sqlite-jdbc.version>3.15.1</sqlite-jdbc.version>
<statsd-client.version>3.1.0</statsd-client.version>
<sun-mail.version>${javax-mail.version}</sun-mail.version>
<thymeleaf.version>2.1.6.RELEASE</thymeleaf.version>
<thymeleaf-extras-springsecurity4.version>2.1.3.RELEASE</thymeleaf-extras-springsecurity4.version>
<thymeleaf-extras-conditionalcomments.version>2.1.2.RELEASE</thymeleaf-extras-conditionalcomments.version>
<thymeleaf-layout-dialect.version>1.4.0</thymeleaf-layout-dialect.version>
<thymeleaf-extras-data-attribute.version>1.3</thymeleaf-extras-data-attribute.version>
<thymeleaf-extras-java8time.version>2.1.0.RELEASE</thymeleaf-extras-java8time.version>
<tomcat.version>8.5.23</tomcat.version>
</properties>
...............
<dependencyManagement>
<dependencies>
<!-- Spring Boot -->
<dependency>
<groupId>org.springframework.boot</groupId>
<artifactId>spring-boot</artifactId>
<version>1.5.9.RELEASE</version>
</dependency>
<dependency>
<groupId>org.springframework.boot</groupId>
<artifactId>spring-boot</artifactId>
<type>test-jar</type>
<version>1.5.9.RELEASE</version>
</dependency>
<dependency>
<groupId>org.springframework.boot</groupId>
<artifactId>spring-boot-test</artifactId>
<version>1.5.9.RELEASE</version>
</dependency>
<dependency>
<groupId>org.springframework.boot</groupId>
<artifactId>spring-boot-test</artifactId>
<type>test-jar</type>
<version>1.5.9.RELEASE</version>
</dependency>
</dependencies>
</dependencyManagement>
如果在项目中引入了对应的依赖,那么这些依赖的版本就会是spring-boot-parent中定义的版本
Spring Boot提供了许多开箱即用的依赖模块,这些模块都是以spring-boot-starter-XX命名的。比如要开启Spring Boot的web功能,只需要在pom.xml中配置spring-boot-starter-web即可
因为其依赖于spring-boot-starter-parent,所以这里可以不用配置version。保存后Maven会自动帮我们下载spring-boot-starter-web模块所包含的jar文件。如果需要具体查看spring-boot-starter-web包含了哪些依赖
当然可以手动排除一些我们不想使用的依赖,可以使用如下方法1
2
3
4
5
6
7
8
9
10
11
12
13
14
15
16
17<dependencies>
<dependency>
<groupId>org.springframework.boot</groupId>
<artifactId>spring-boot-starter-web</artifactId>
<exclusions>
<exclusion>
<groupId>org.springframework.boot</groupId>
<artifactId>spring-boot-starter-tomcat</artifactId>
</exclusion>
</exclusions>
</dependency>
<dependency>
<groupId>org.springframework.boot</groupId>
<artifactId>spring-boot-starter-jetty</artifactId>
</dependency>
</dependencies>
我们使用上面的方式排除了spring-boot-starter-web中的tomcat依赖,换成了使用jetty依赖
最后,配置了一个maven插件
spring-boot-maven-plugin为Spring Boot Maven插件,提供了:
把项目打包成一个可执行的超级JAR(uber-JAR),包括把应用程序的所有依赖打入JAR文件内,并为JAR添加一个描述文件,其中的内容能让你用java -jar来运行应用程序。
搜索public static void main()方法来标记为可运行类。
对于spring boot的简单介绍就到此为止,后面将一步一步深入继续介绍有关spring boot的内容